CI/CD Setup
Automated package versioning and publishing with GitHub Actions
Your data models are Malloy code in plain files, so they fit the engineering workflow you already have: version them in Git, review them in pull requests, and publish automatically when changes merge. This page sets up that last step — a CI/CD pipeline using our GitHub Actions template.
Two ways to work in Git. This page is for models built in your IDE and kept in a repository you own. Models built in the Credible App get the same review and history through git-backed modeling, where each change becomes a branch and a pull request in a repository Credible hosts and merging is what publishes. The two coexist in one environment, package by package — see How this fits with git-backed modeling.
How It Works
When you push changes to your main branch:
- Detect — the pipeline identifies which packages changed
- Version — it bumps the patch version in each changed package's
publisher.json, because a published version is immutable - Publish — it publishes the new versions to your Credible environment with the CLI
A compile error fails the publish step, so a broken model never becomes a served version.
Rolling back never touches CI: re-pin the previous version as latest in the Credible App and every consumer follows, with nothing to rebuild (see Serving and version management).
Prerequisites
- A GitHub repository for your packages
- Admin access to the repository
- A Credible organization and environment
Setup
Step 1: Create Repository from Template
- Go to the CI/CD template repository
- Click "Use this template" → "Create a new repository"
- Choose your organization and enter a repository name
The template includes all necessary scripts and GitHub Actions workflows.
Step 2: Configure GitHub App
The CI/CD bot needs a GitHub App to commit version bumps back to your repository.
Create the App:
- Go to your GitHub organization: Settings → Developer settings → GitHub Apps → New GitHub App
- Configure:
- Name: a name unique across all of GitHub (e.g.,
credible-<company>-cicd-bot). GitHub App names are global, socredible-cicd-botis already taken — pick your own. The name is cosmetic; the workflow authenticates with the App ID and private key, not the name. - Homepage URL: required by GitHub — any valid URL works (e.g., your repository URL)
- Webhook: Uncheck "Active"
- Repository permissions: Contents (Read/Write), Pull requests (Read/Write), Metadata (Read), Environments (Read)
- Installation: "Only on this account"
- Name: a name unique across all of GitHub (e.g.,
- Click Create GitHub App
- Note the App ID at the top of the page
- Scroll to Private keys → Generate a private key (save the
.pemfile) - Go to Install App → Install, choose Only select repositories, and select your repository. Avoid All repositories: the App can write repository contents, and this pipeline only ever needs the one.
Step 3: Configure Secrets
Go to your repository: Settings → Secrets and variables → Actions → New repository secret
| Secret | Value |
|---|---|
CICD_BOT_APP_ID | Your GitHub App ID |
CICD_BOT_APP_PRIVATE_KEY | Entire contents of the .pem file, including the -----BEGIN and -----END lines |
JWT_ACCESS_TOKEN | Credible API token (see note below) |
Generate a Credible API token using the CLI: cred add group-access-token. Create a group whose only member is the pipeline, so the token carries exactly the access the pipeline needs. The token is shown once — store it as a repository secret, never in the repository itself. See the CLI documentation for details.
The group used to generate the token needs Modeler access to your environment:
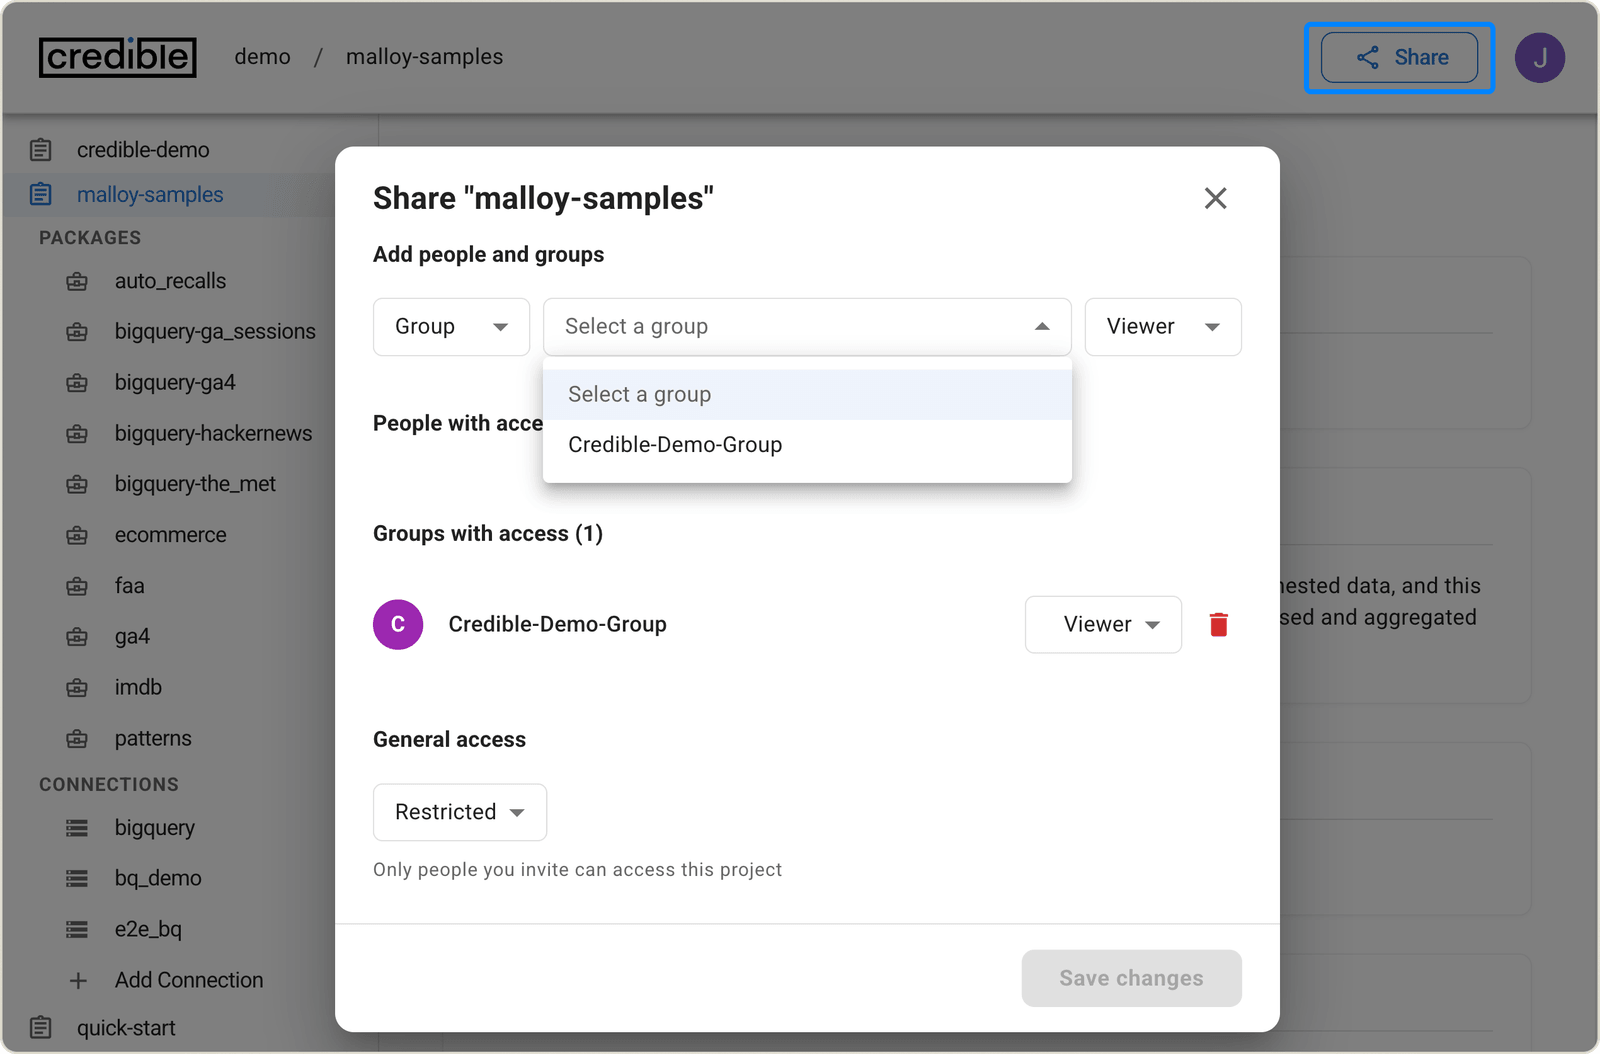
Step 4: Configure Variables
Go to: Settings → Secrets and variables → Actions → Variables
| Variable | Value |
|---|---|
CRED_ORG | Your Credible organization name |
CRED_ENV | Your Credible environment name |
SET_LATEST | true or false (optional, defaults to true) |
Step 5: Configure Branch Protection
- Go to Settings → Branches → Add branch protection rule
- Branch name pattern:
main - Enable:
- Require a pull request before merging, with at least one approval
- Allow specified actors to bypass required pull requests → add your App
- Require status checks to pass before merging
- Require conversation resolution before merging
- Restrict who can push to matching branches → add your App
The two App entries are what let the pipeline commit its version bump to a branch that otherwise refuses direct pushes. Without them the bump cannot land and the publish never runs.
Publishing to More Than One Environment
The template publishes to a single environment. To promote through staging and
production, give deploy.yaml one publish job per environment and pass each an
environment name, which binds that job to a
GitHub Environment
and applies its protection rules:
jobs:
  publish-staging:
    needs: bump
    if: needs.bump.outputs.bumped != ''
    uses: ./.github/workflows/publish-packages.yml
    with:
      environment: staging
      packages: ${{ needs.bump.outputs.bumped }}
      cred_org: ${{ vars.CRED_ORG }}
      cred_env: ${{ vars.CRED_ENV_STAGING }}
    secrets:
      jwt_access_token: ${{ secrets.JWT_ACCESS_TOKEN_STAGING }}
Referencing a GitHub Environment is what buys you the gate: add a required
reviewer to production and the production publish waits for a human while
staging proceeds untouched. Each environment carries its own token, so a
staging credential can never publish to production.
This is why the App needs Environments (Read) in Step 2. Give each
environment its own CRED_ENV* variable and token secret rather than reusing
one pair.
Repository Structure
Your repository should follow this structure:
your-repo/
├── .github/workflows/    # CI/CD workflows (from template)
├── packages/
│   ├── package-one/
│   │   ├── publisher.json
│   │   └── [your .malloy files]
│   └── package-two/
│       └── ...
└── scripts/              # CI/CD scripts (from template)
Each package needs a publisher.json:
{
  "name": "your-package-name",
  "version": "0.0.0",
  "description": "Package description"
}
Merge Strategy
Do not use "Squash and merge" for pull requests that modify packages. Squashing can cause the pipeline to miss package changes. Use Merge commit or Rebase and merge instead.
How This Fits With Git-Backed Modeling
Both paths give a model change a pull request, a review, and a published version with a record of where it came from. They differ in who builds the model and where the source lives.
| CI/CD from your repository (this page) | Git-backed modeling | |
|---|---|---|
| Where the model is built | Your IDE and your coding agent | The Credible App, by the in-app agent |
| Where the source lives | A repository you own, in your layout | A repository per environment that Credible hosts |
| What publishes a version | Your pipeline runs cred publish on merge | Merging the pull request Credible opened for the draft |
| Review and checks | Your pull requests, your rules, your CI | A pull request per change, with Credible's compile verdict as a check run |
| Who contributes | Engineers | Engineers, analysts, and domain experts, in plain language |
They work side by side in one environment:
- Packages you publish from here keep publishing from here after an environment is enrolled in git-backed modeling. Enrollment applies to drafts created in the App; a package git-backed modeling has never seen is untouched by it.
- A package becomes git-backed the first time it is edited in the App. The agent imports the published version as the starting point, and from then on that package publishes only through a pull request.
- Decide per package which side owns it, and keep it there. Both serve from the same environment and the same governed model.
Next Steps
Git-Backed Modeling
The same review and history for models built in the App, with merge as the publish
Publishing
Versions, promotion, and rollback
CLI
The deploy step this pipeline runs, from your terminal
When a run fails, the workflow logs in the GitHub Actions tab name the step. Email us the run ID and the error if the cause isn't there.